Why Paper Buckles When Glue Dries
Why paper buckles when glue dries—and how grain, adhesive, and gentle pressing can help a bonded paper cover dry flatter and keep its hinge neat.
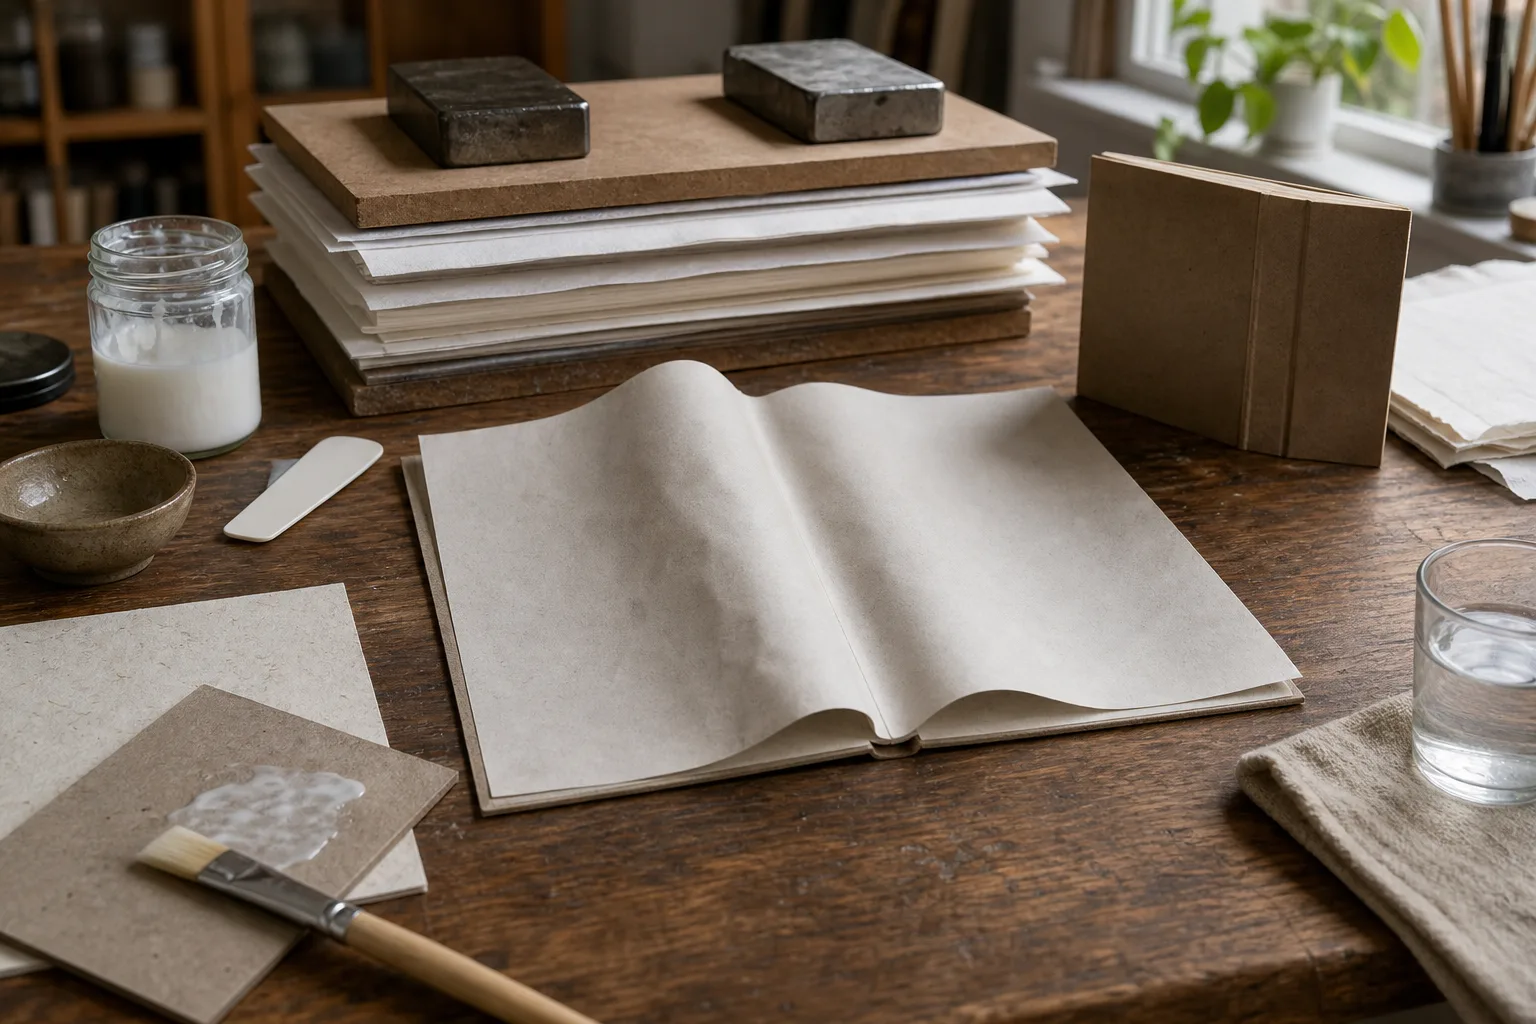
Why paper buckles when glue dries is the question that comes up when a carefully smoothed cover rises into ripples overnight. The culprit is usually a combination of moisture, uneven bonding, and the way the paper is oriented—not simply too much glue.
Uneven Movement
Imagine you are making a small folded cover for a handmade notebook. You brush water-based PVA glue onto uncoated paper, press it against a card insert, and smooth it flat. As it dries, a wave appears near the middle and one corner lifts.
Water can make paper fibers swell. As moisture leaves, the sheet changes shape again. If one area is wetter than another, or if the adhesive holds one part firmly while another part moves, strain can gather into a ripple, curl, or lifted edge.
The result depends on the specific paper, glue, backing, and working conditions. A thin, absorbent sheet bonded to a stiff card may show movement more readily than a sturdier sheet, but paper weight alone cannot prevent uneven wetting or tension.
Start by looking at the whole bond: paper, adhesive, backing, and drying support.
Paper Grain
Paper has a predominant fiber direction, often called its grain. The sheet may bend more readily one way than another, and its response to moisture can vary with direction. How strongly that matters depends on the paper and the shape of the object.
For a folded cover, the grain is often placed parallel to the spine or hinge so the sheet can bend more readily along that fold. A box panel or another shape may call for a different arrangement, so consider where the paper must flex rather than relying on a universal rule.
To compare directions, take a scrap and flex it gently one way, then turn it a quarter turn and flex it again. The easier direction is a useful clue to the grain. Avoid making a crease while checking.
Choose the orientation before cutting the finished piece.
Adhesive And Coverage
Water-based PVA, paper paste, and glue sticks behave differently. PVA and paste can add moisture to the sheet; a glue stick usually applies less liquid at the surface, but may not suit every material or bond. Follow the adhesive maker’s directions for the paper and backing you are using.
When the materials allow, spread a thin, continuous coat on the less absorbent surface rather than soaking the paper. A small flat brush, silicone spreader, or smooth scrap of card can help distribute it. Look for dry gaps and pooled patches; aim for an even film, not a glossy layer.
Before assembling the visible piece, try the chosen adhesive on a scrap of the same paper and backing. Check whether it stains, wrinkles, or gives you enough working time to position the layers. The sample offers useful guidance, though the full object may behave differently.
Use a light, even coat and check the bond before committing the finished sheet.
Pressing And Drying
Pressure can keep layers in contact while an adhesive sets, but enclosing a damp piece between surfaces that do not absorb moisture may slow drying. Leaving a piece unsupported can also let an edge lift. The aim is even support without sealing in dampness.
For the notebook cover, place the assembly between clean absorbent blotter or plain, unprinted paper, then set it beneath a flat board with light, even weight. If the interleaving sheets become damp, replace them with dry ones. Keep the board supporting the entire piece rather than bearing down on one edge.
Let the cover dry in a stable indoor spot, away from direct heat and strong sunlight. Check that it feels dry through the layers before removing the support; a dry edge does not necessarily mean the center is dry.
Keep the piece flat, supported, and able to release moisture.
Common Paper Questions?
Can heavier paper prevent buckling?
Heavier paper may resist visible rippling better than a very thin sheet, but it can still distort if it is wetted unevenly or bonded under tension. Match the sheet to the object and try the adhesive on a scrap.
Should glue go on paper or backing?
For absorbent paper bonded to card, applying a thin coat to the card may reduce direct wetting of the paper. The appropriate surface depends on the materials and adhesive, so follow the product directions and check a sample first.
How do you find paper grain?
Flex a scrap gently in two directions and compare how readily it bends. The easier direction is a useful grain clue; for a cover hinge, align it with the fold when the design permits.
What if bonded paper is already wavy?
While the adhesive is still drying, keep the piece flat between clean absorbent sheets under light, even support. If the bond has set and the distortion remains, avoid adding water or forcing it flat, which could damage the paper or bond.
A Worked Cover
Say you have a fresh sheet of uncoated drawing paper, a card insert, and PVA glue for a small notebook cover. First, you flex a scrap in two directions and find that it bends more readily parallel to the intended spine. You cut the cover with that direction along the hinge.
Next, you spread a thin coat of glue on the card with a flat brush, checking for pooled areas and dry gaps. You lay the paper down from the hinge outward, smooth it with a clean scrap of card, and place the assembly between absorbent sheets under a flat board. If a sheet picks up moisture, you replace it; if the paper begins to lift at an edge, you adjust the support so the whole cover rests evenly.
The expected result is a cover that dries with a neater hinge and fewer ripples, though minor movement may remain. The tradeoff is that the maker must monitor the drying assembly rather than assuming pressure alone will solve uneven bonding.
Checks Before Bonding
- Check the scrap’s bend in two directions; if one direction bends more readily, align it with the hinge when the design allows, otherwise orient the sheet to suit the object’s main folds.
- Check the paper and backing for absorbency by applying a small adhesive sample; if the paper stains or distorts, try a different compatible adhesive, otherwise proceed with a light coat.
- Check the glue layer for pools and dry gaps; if either is visible, spread the adhesive more evenly, otherwise bring the layers together.
- Check whether the layers can be positioned within the adhesive’s working time; if not, prepare the surfaces and placement before applying glue, otherwise assemble while the adhesive remains workable.
- Check the support for full, even contact; if an edge or corner is unsupported, reposition the board or interleaving sheets, otherwise leave the piece to dry.
- Check the absorbent interleaving for dampness during drying; if it feels damp, replace it with a dry sheet, otherwise keep the assembly supported.
For why paper buckles when glue dries, think in layers: moisture can change the sheet, grain can influence how it bends, and adhesive can hold parts in place unevenly. A measured coat, a considered fold direction, and open, even support make a small bonded paper object easier to keep smooth.
Nearby questions
The Cut List That Saves the Last Good Board
A woodworking cut list helps fit parts to usable stock, account for kerf and defects, and…

A Door Handle Is a Small Study in Leverage
Door handle leverage explains how grip, position, and clearance affect a door’s movement, helping you choose…